Fab1 Posted December 4, 2016 Share Posted December 4, 2016 Scored these off the mrs which I'm thinking of making up a braised angle iron aluminium frame that the stainless tray sits in.Ill then attach the frame to my swivelling mounts I made on my side rail and then attach the cutting board to the tray with a hinge. This way I can store my bait in the tray and keep my bait board clear and the bait from drying out in the sun/air. Thoughts? Link to comment Share on other sites More sharing options...
Raymondo Posted December 4, 2016 Share Posted December 4, 2016 As a wiser man than I once said , Why not. Link to comment Share on other sites More sharing options...
Guest Guest123456789 Posted December 5, 2016 Share Posted December 5, 2016 Don't you store your bait in your esky? Here is my bait board. I LOVE it! Link to comment Share on other sites More sharing options...
Fab1 Posted December 5, 2016 Author Share Posted December 5, 2016 2 hours ago, flatheadluke said: Don't you store your bait in your esky? Here is my bait board. I LOVE it! Yes I store my bait in my esky and thaw out what I need on the baitboard I was previously using which did an ok job except it didn't have a tray underneath and had low sides. I want a tray underneath the board to store my bait for immediate use and when moving spots So I don't have to pack up the bait or cover it from the wind/sun. I'll most likely hinge the board to the tray and make the lot removable or fit rails underneath the board so the tray slids out to access the bait. It will really just be an upgrade to what I was using to make my life that little bit easier when out in the boat besides I've got all the things I need for it already and really won't cost me anything. Ill have a think and see what I will do. I like being able to slid it up/down the rail to access from the front seat or rear bench and folding it into the boat when not being used or removing it entirely. I had a bait board similar to yours with sides on it that I made except I made adjustable nylon clamps with stainless bolts and wing nuts that would clamp the gunnel instead of directly drilling and screwing into the gunnel on a previous boat. The same thing,you could loosen the wing nuts and slide it forward or backward to suit where you sat in about 2 sec. Link to comment Share on other sites More sharing options...
Guest Guest123456789 Posted December 5, 2016 Share Posted December 5, 2016 (edited) One possible problem is that steel will get really hot in the sun and affect your bait. it looks like a large tray, would be good to add a divider to either keep baits seperate or even have bait one side and scissors, knife and pliers the other. if it's going to be hinged you might like to add an outlet and some hose so you can easily clean and then drain after use. But if it's fully removable than this is less of a concern. Edited December 5, 2016 by Guest123456789 Typo Link to comment Share on other sites More sharing options...
Fab1 Posted December 5, 2016 Author Share Posted December 5, 2016 1 hour ago, flatheadluke said: One possible problem is that steel will get really hot in the sun and affect your bait. it looks like a large tray, would be good to add a divider to either keep baits seperate or even have bait one side and scissors, knife and pliers the other. if it's going to be hinged you might like to add an outlet and some hose so you can easily clean and then drain after use. But if it's fully removable than this is less of a concern. I thought about the steel getting hot also.The board will over hang the tray by about 50mm all round which will help a little and it will have plastic dividers and store my knife,pliers etc in side to keep the board free of anything. Link to comment Share on other sites More sharing options...
Guest Guest123456789 Posted December 5, 2016 Share Posted December 5, 2016 You could always silaflex a piece of rubber to the bottom from Clark rubber if it gets too hot Link to comment Share on other sites More sharing options...
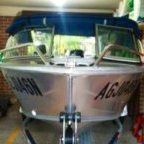
Fab1 Posted December 5, 2016 Author Share Posted December 5, 2016 It will look something like this when it's done.I will mount it to a stainless/alloy rod where the pvc pipe is in the photo and the board will hinge and have sides draining into the water.A R clip either end of the rod and the whole lot will be removable from those black brackets I made as well as be able to be tilted and slid forward/Backward and be supported by the gunnel. Will see how it turns out. Link to comment Share on other sites More sharing options...
Guest Guest123456789 Posted December 5, 2016 Share Posted December 5, 2016 Looks great and will function really well. My own personal taste, seems overly complex and bulky. I'd opt to just bolt or weld a bracket onto the gunwhale in a fixed position and then attach the bait board to that. I would also position the board so less overhang was out of the boat. Bait in a sealed plastic bag in your icy cold esky is easy to access. Just my opinion, but it is YOUR boat and that's the fun thing: personalisation! Good luck with it Fab. Cheers, Luke Link to comment Share on other sites More sharing options...
Guest Guest123456789 Posted December 6, 2016 Share Posted December 6, 2016 Just one final pic of my own set up, again my own taste and style and not saying it's the best. Everything is accessible from the back seat, bait board with plyers in gap, tackle, everything. I sikaflexed the knife to the side pocket. It's a diving knife which you have to press a button to remove. Bait lives in my esky in a snap lock plastic bag. Hope this helps. I look forward to seeing your finished product. Luke Link to comment Share on other sites More sharing options...
Guest Guest123456789 Posted December 6, 2016 Share Posted December 6, 2016 One thing i just realised I'm doing differently from you, I used salted baits which means I don't have a need to thaw bait out. So yeah the pan would be great to thaw and store frozen bait. Link to comment Share on other sites More sharing options...
Fab1 Posted December 6, 2016 Author Share Posted December 6, 2016 It's nice setting your boat up to how you like it mate and you have everything you need there. I salt or brine my bait also but still like to store it in the freezer and keep it in my esky when on the boat.The reason I like the board over hanging the gunnel is i find it gives me more room inside the boat plus the mess just washes off over the side into the drink as on a small boat like mine you want as much room as possible. And the tray will be handy for storing my bait for immediate use as opening and closing the Esky will be minimised containing the cold inside. Ill try to make it by the weekend if I have time and see how it goes and can always change things around. Cheers. Link to comment Share on other sites More sharing options...
recurve Posted December 10, 2016 Share Posted December 10, 2016 (edited) This is style is the most practical, Get a board with high back and sides like this. Same as what I have, mine is mounted in centre of transom as is factory. If you want to protect your baits just put a white wet cloth over them. White deflects the sun and wet keeps it cool. I normally fish early early and back by 10am so not an issue for me and I always hope that my bait gets used quicker than It can go off. Invest in this design of bait board. You can leave everything it is when underway, I have not lost any thing from it yet I think the tin underneath is going to have too many issues. Heat, dislodging when underway, corrosion of brackets etc. Big, static and with high sides is the proven king of design for bait boards. Get a piece of hardwood ply from bunnings as the cutting board and insert. Done and dusted. Edited December 10, 2016 by recurve Added Point Link to comment Share on other sites More sharing options...
Fab1 Posted December 10, 2016 Author Share Posted December 10, 2016 After a bit of cutting,drilling and shaping she's all done.I couldn't help myself and made a tool holder for the things I use also. Im happy with the results. Cheers. Link to comment Share on other sites More sharing options...
Guest Guest123456789 Posted December 10, 2016 Share Posted December 10, 2016 Looks great Fab particularly the strip around the sides to stop bait sliding off. Link to comment Share on other sites More sharing options...
Raymondo Posted December 10, 2016 Share Posted December 10, 2016 Nice one. You can tell a lot about a person by how they setup there boat. Your definitely a thinker. Link to comment Share on other sites More sharing options...
Sigma Posted December 11, 2016 Share Posted December 11, 2016 (edited) Hahaha....Fab, the "ideas" man. Love IT!! Well done buddy....not surprised at all. Edited December 11, 2016 by Sigma Link to comment Share on other sites More sharing options...
Fab1 Posted December 11, 2016 Author Share Posted December 11, 2016 On 11 December 2016 at 4:59 AM, flatheadluke said: Looks great Fab particularly the strip around the sides to stop bait sliding off. Thanks mate.The strips around the sides are there to contain the bait juices which I'll keep for making berley later.They drain through the holes in the bait board into the tin. 22 hours ago, Raymondo said: Nice one. You can tell a lot about a person by how they setup there boat. Your definitely a thinker. Cheers,I like to make things easier on myself and try to think outside the box. 10 hours ago, Sigma said: Hahaha....Fab, the "ideas" man. Love IT!! Well done buddy....not surprised at all. Thanks mate.Some would say I have to many ideas.My mrs knows where to find me...In the shed. Link to comment Share on other sites More sharing options...
recurve Posted December 11, 2016 Share Posted December 11, 2016 That' pretty cool turned out better than I thought from your description. I like your work. Link to comment Share on other sites More sharing options...
Fab1 Posted December 11, 2016 Author Share Posted December 11, 2016 44 minutes ago, recurve said: That' pretty cool turned out better than I thought from your description. I like your work. Thanks mate.I did see your post above and was using a wet terry toweling cloth to keep my baits cool while on the board but had to be careful while under way everything didn't fly off. My intensions with this idea is have my bait for immediate use such as pillys already cut in half stored in trays in the tray and simply lift the lid to grab one when re-baiting.The same thing with my strip baits,prawns etc.The board will stay clear at all times other than when I'm preping my baits and the bulk of my bait will stay frozen in my esky until needed. Also I don't want a transom mounted bait board as I have a Manual Tilt n Trim outboard that I need to get to at times. I did make some high sides for the board out of 50x50 ally if I want to remove the strips and install those instead. will see how it goes and as usual I can change things around if need be. Link to comment Share on other sites More sharing options...
brad_tate Posted December 27, 2016 Share Posted December 27, 2016 (edited) Love your work Fab1. I recently replaced wheel bearings for the first time and made sure I re-read your fantastic posts beforehand so I didn't mess it up. One suggestion for your tray. Solid or semi solid small freezer blocks in flexible plastic are a dime a dozen and take quite a while to unfreeze, so keeping a couple in the tray may allow your bait to thaw gently but still stay cool. You could put a couple on one side and when the bait is thawed use them to cover the bait and keep it cool and in good nick. You can even keep a couple of spares in the esky if they don't last long enough for you. Edited December 27, 2016 by brad_tate Link to comment Share on other sites More sharing options...
Fab1 Posted December 27, 2016 Author Share Posted December 27, 2016 3 hours ago, brad_tate said: Love your work Fab1. I recently replaced wheel bearings for the first time and made sure I re-read your fantastic posts beforehand so I didn't mess it up. One suggestion for your tray. Solid or semi solid small freezer blocks in flexible plastic are a dime a dozen and take quite a while to unfreeze, so keeping a couple in the tray may allow your bait to thaw gently but still stay cool. You could put a couple on one side and when the bait is thawed use them to cover the bait and keep it cool and in good nick. You can even keep a couple of spares in the esky if they don't last long enough for you. Thanks Brad.How did you find changing your bearings yourself?Hopefully my post made sense. I salt/brine most of my bait and fish at night 95% of the time so high heat really isn't an issue and will give those soft ice packs a try also and see how they go. Cheers. Link to comment Share on other sites More sharing options...
brad_tate Posted December 28, 2016 Share Posted December 28, 2016 Fab1, my bearing change went well. I did buy a bearing driver set online first to make seating the new races a bit easier, but removed the old races with a drift which wasn't as tricky as I thought it would be. The only issue I had was with the rear seal. Although obvious in hindsight I had to Google to check which side was the back and which was the front! I then found I couldn't reseat the rotor with the seal attached. Instead I slipped the seal onto the stub axle first and then fit the rotor, making sure the seal went in to cover the rear bearing cleanly. Your instructions were very clear and helpful. Thanks! Link to comment Share on other sites More sharing options...

Recommended Posts
Create an account or sign in to comment
You need to be a member in order to leave a comment
Create an account
Sign up for a new account in our community. It's easy!
Register a new accountSign in
Already have an account? Sign in here.
Sign In Now